Jul 2010 30
DIY: Half Hour Tote Bag3
Posted In Art,Blog,DIY
by Lisa Brady
It seems like all we hear about these days is how the economy is in the crapper, so I am doing my part to save some money and make a kick ass accessory at the same time. The great thing about making something from scratch is it’s completely customizable. I went to the fabric store and got a couple of yards of different fabrics that tickled my fancy and got to sewin’. This is how to make a quick and adorable tote bag.

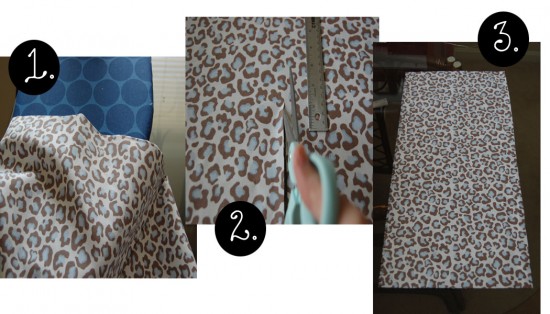
- Step 1: Pick your fabric (I went leopard. Rawr.) and decide how big of a tote you want to make.
- Step 2: Use fabric scissors so you get the cleanest cut possible.
- Step 3: I cut a 12 ¼” by 24 ¼” rectangle. The extra ¼” will be used up when folding the top down to finish the seam later on.

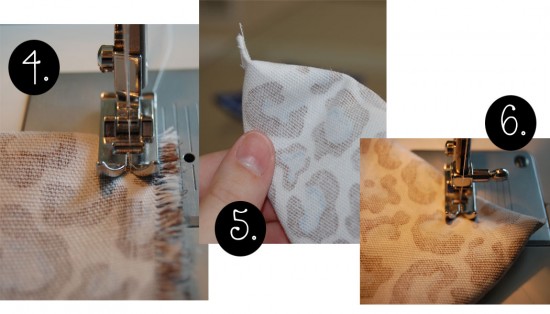
- Step 4: Fold in half inside out and sew a ¼” seam. Repeat on opposite side.
- Step 5: Pinch the bottom corners into a 2” triangle. This takes some finesse. It took me a long time to be able to do this effortlessly. Just practice!
- Step 6: Sew across the top. How far in you sew will determine how the bottom of the bag will look. I usually just eyeball it. The measurement in the photo is about 1 ½”. Repeat on other corner.

- Step 7: Use either your fabric scissors, or pinking shears if you have them, and cut the excess fabric from the corner.
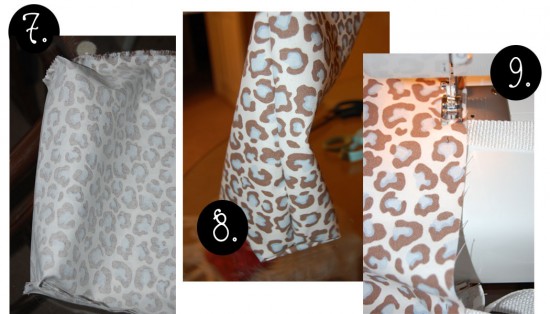
- Step 8: Turn the bag right side out and poke the corners until the bottom boxes out. This is the bottom’s finished result.
- Step 9: Create straps by either using the same fabric as the bag (or even a different fabric if you’re feeling creative) or use a nylon webbing as I did here. You can buy it by the yard at most fabric or craft stores. Measure 2” from the side seam and pin the webbing to the top of the bag, making sure the straps are the same length. Then sew forward and in reverse 2 or 3 times to make sure it’s secure. Repeat for all four straps.

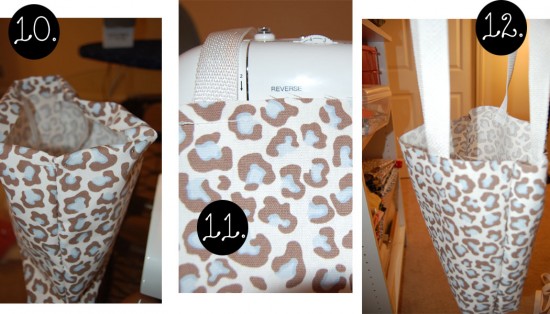
- Step 10: Fold down top about ¼” to ½” (putting straps into the bag) and pin. Sew all the way across the top.
- Step 11: It should look like this when you pull the straps back out.
- Step 12: Double the strap back once more and sew forward and back 2 to 3 times.

- Step 13: Close up of step 12.
- Step 14: Snip those loose threads and you’re ready to go!
This is so easy and comes out so cute you’re going to be making tons of these things. Try not to get frustrated because you will jam your machine or run out of thread at a really inconvenient time.
Just remember the only thing that separates us from the animals is our ability to accessorize.

